
openec2 Article Description
Part 2
Configure an SES/S3 Bucket for forwarding email
Create a bucket in your region. Bucket names need to be unique across all of the regions.If you create a bucket for file transfers to other people, it will need to remove the “Block all public access” checkbox. It is good to have one of these so you don’t necessarily need to use Dropbox or One Drive or other file transfer services. If you do this, any newly uploaded file has to be clicked on, and take the action to make it public.
It is good to create a private bucket for your personal files too. These can be accessed by the User key we previously made, not the SMTP key, with CyberDuck or Commander One apps. Commander One has the ability to make your transferred file(s) public or private.
If you create other buckets in the future, you may be given various S3 options. We use the standard option without any specialised encryption options. The storage costs are low, so it is okay to use this option where objects are redundantly stored across the region in other data centers (zones) such as ap-southeast-2b, and ap-southeast-2c.
If you access S3 URL’s via a website, keep in mind that various VPN services and their IP addresses can be blocked. It would be better to use S3 for private work, and an EFS file system for public work that holds files infrequently accessed at low cost. EFS devices can be mounted disks as a filesystem in Linxu2023 and with a little effort, on EC2’s Debian. You will not have success with external mounts outside of AWS services. EFS will be in another lesson, but it too has options for either using one zone or all, or specialist encryption.
File that are at rest on the S3 buckets, or EFS disks are encrypted. File transfers under your website SSL certificate are encrypted. Just make sure any file transfer programs/apps use secure protocols, namely SFTP or SSH. When later configuring Nginx or Apache (Linux2023 uses a variant of Apache called httpd) http:// requests will be redirected to https:// requests. (I may provide a lesson on LiteSpeed as another engine.)
It is also possible to mount more disk space with a regular GP3 disk as another filesystem option.
Use the options in the diagram below to create an e-mail bucket. I always enable ACL’s for my own work. If not, one can get stuck with inability to modify permissions on that bucket.
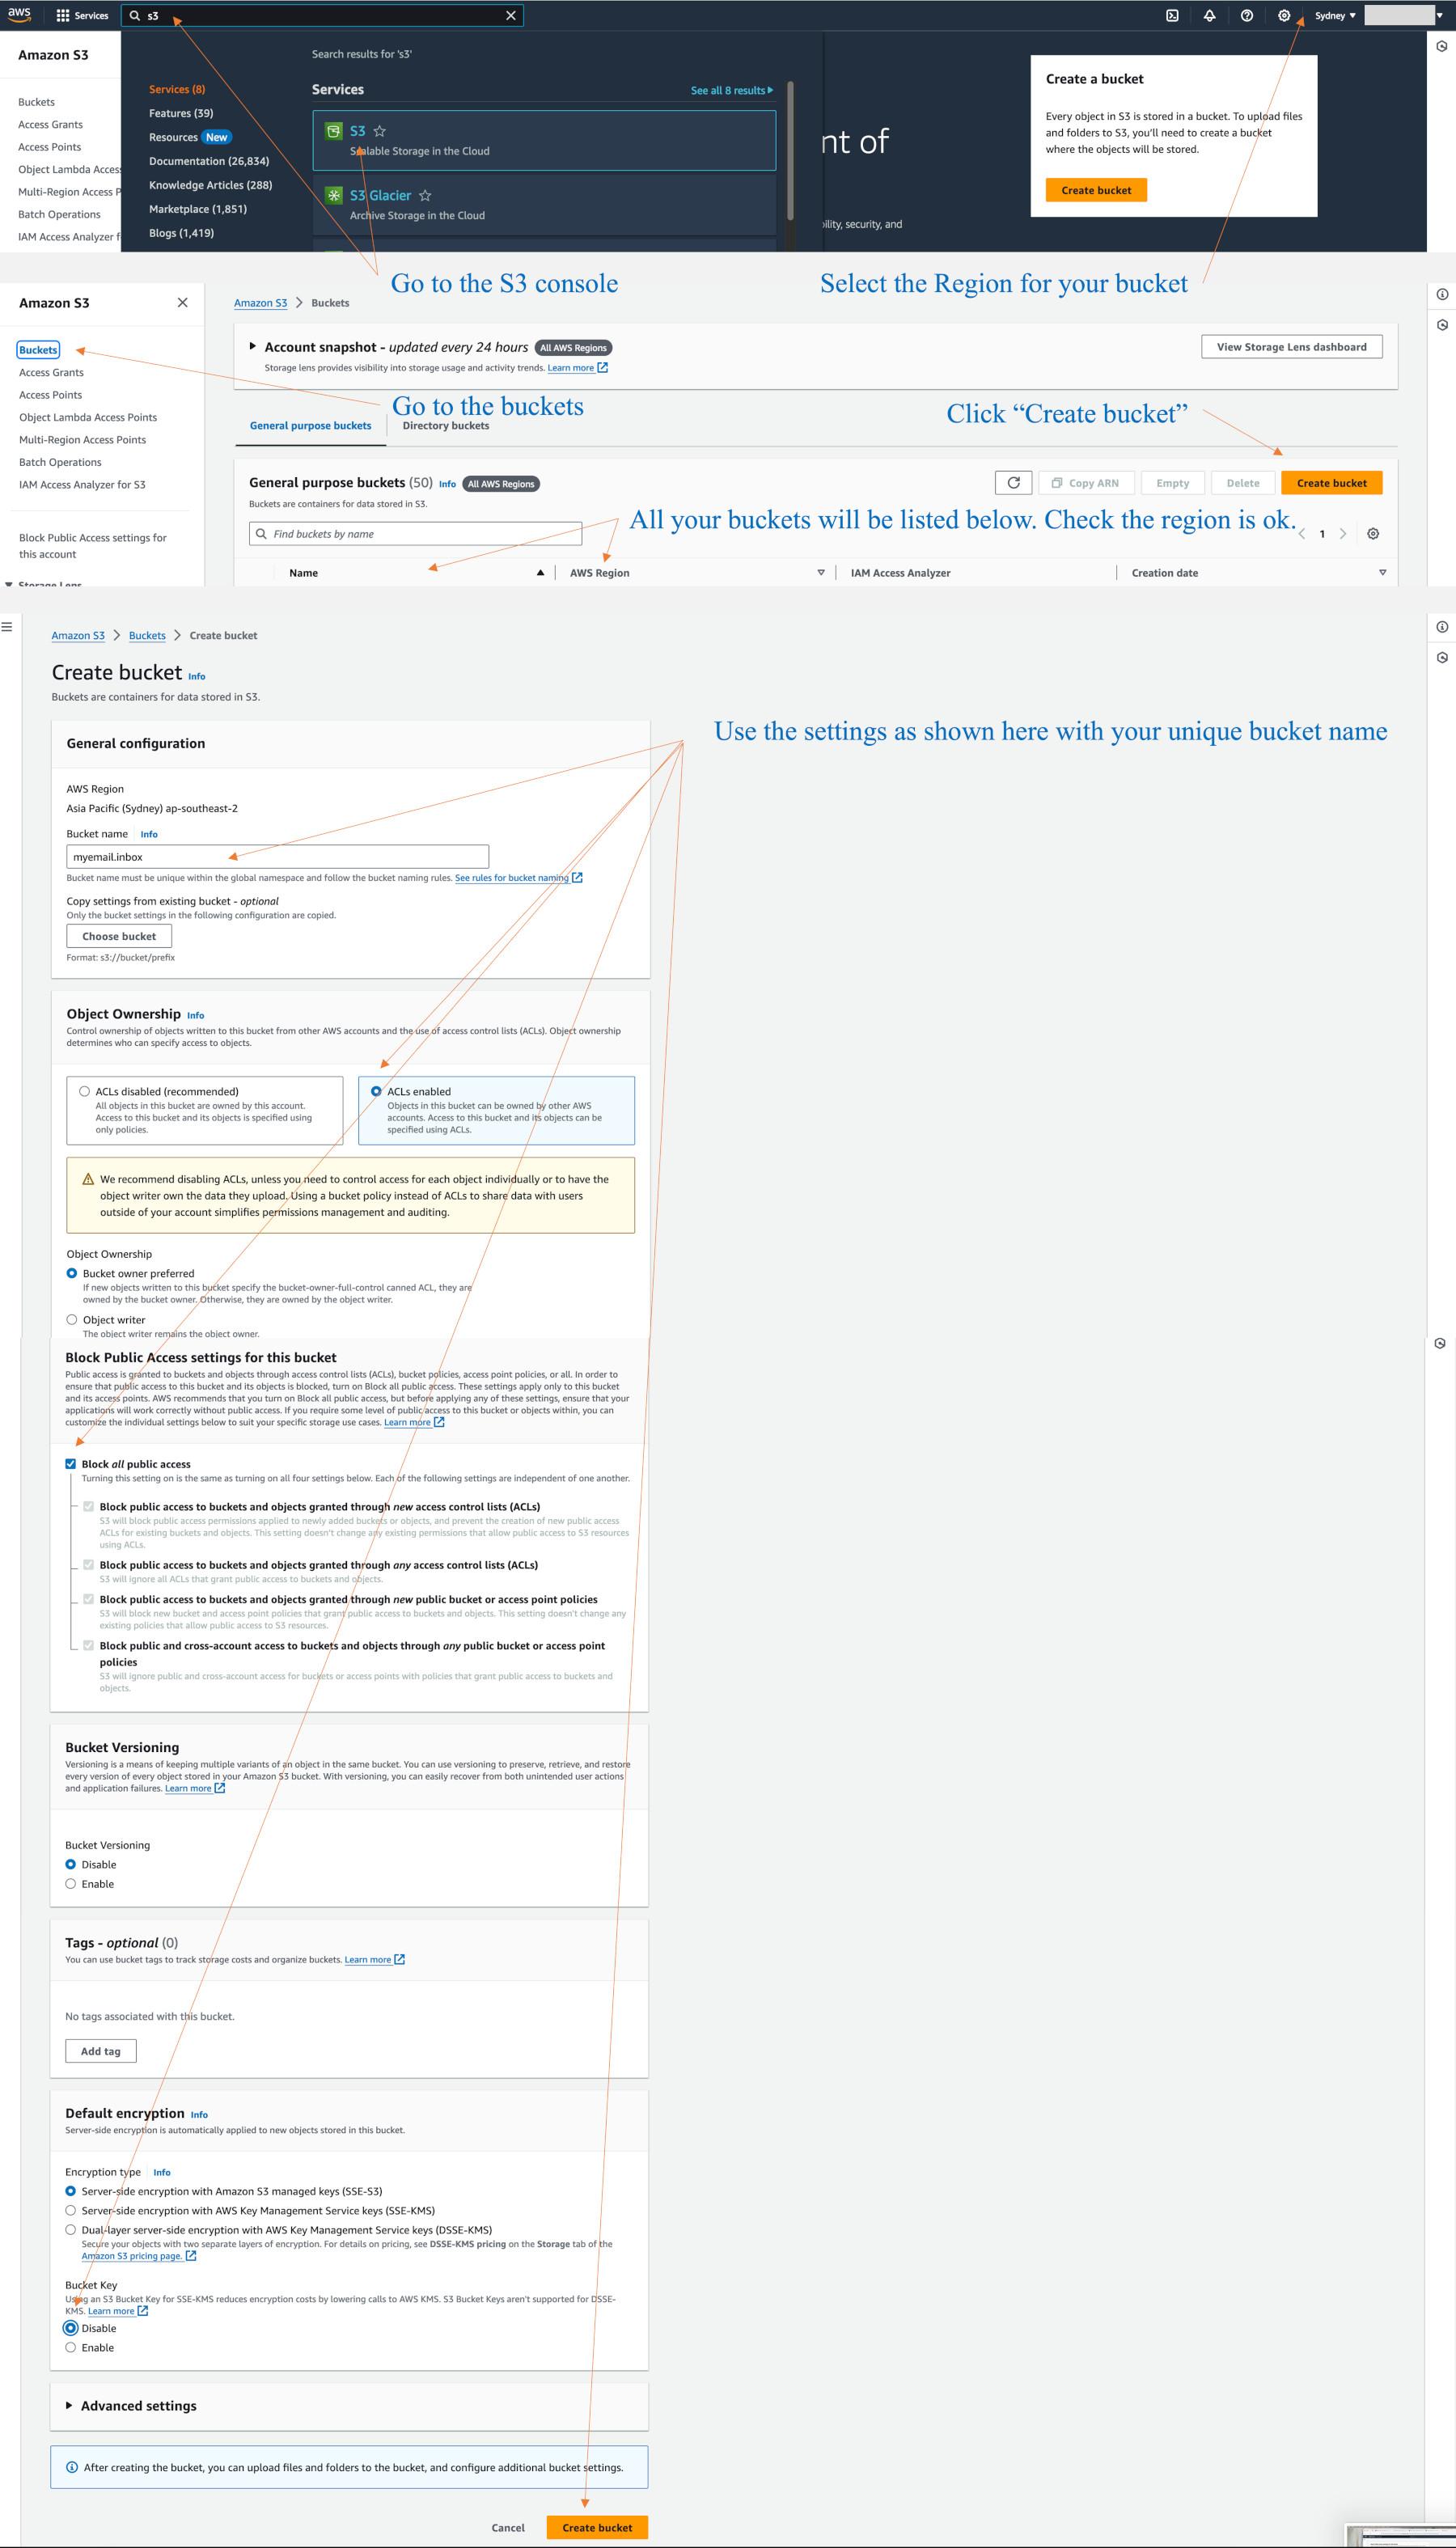
We will add permissions and a life cycle for objects in the bucket.
S3 buckets are similar to Unix/Linux filesystems, but they are not. We have various “aws” commands we use in shell scripts or on a terminal command line to work quickly with the contents. Advanced programming can benefit in performance by using the “aws sync” command rather than looping through a directory listing. Our work won’t go to that level.
The bucket can have sub-directories, (which I use), however these may not appear visible if they have no objects in them. The life cycle rules may also seem to vanish or not update readily – they are an oddity, but it is good to set e-mails to be stored for 365 days in keeping with Australia’s practice to keep email records.
Go to your bucket Permissions tab, and edit the Bucket Policy. Add these lines with your own Amazon AWS Account number – as readily shown in the top right pop down menu.
{
    "Version": "2012-10-17",
    "Statement": [
        {
            "Sid": "AllowSESPuts",
            "Effect": "Allow",
            "Principal": {
                "Service": "ses.amazonaws.com"
            },
            "Action": "s3:PutObject",
            "Resource": "arn:aws:s3:::MYEMAIL_BUCKET_NAME/*",
            "Condition": {
                "StringEquals": {
                    "AWS:SourceAccount": "YOUR_ACCOUNT_NUMBER"
                },
                "StringLike": {
                    "AWS:SourceArn": "arn:aws:ses:*"
                }
            }
        }
    ]
}
In the above example, if you created myemail.com.inbox, use that name for MYEMAIL_BUCKET_NAME.
Let’s add a 365 day life cycle policy.
Go to the Management tab. Click on “Create lifecyle rule”. These rules can be modified at any time. If you are having difficulty seeing your modifications, try a full page refresh on the entry level “Objects” tab. This tab shows your objects (files).
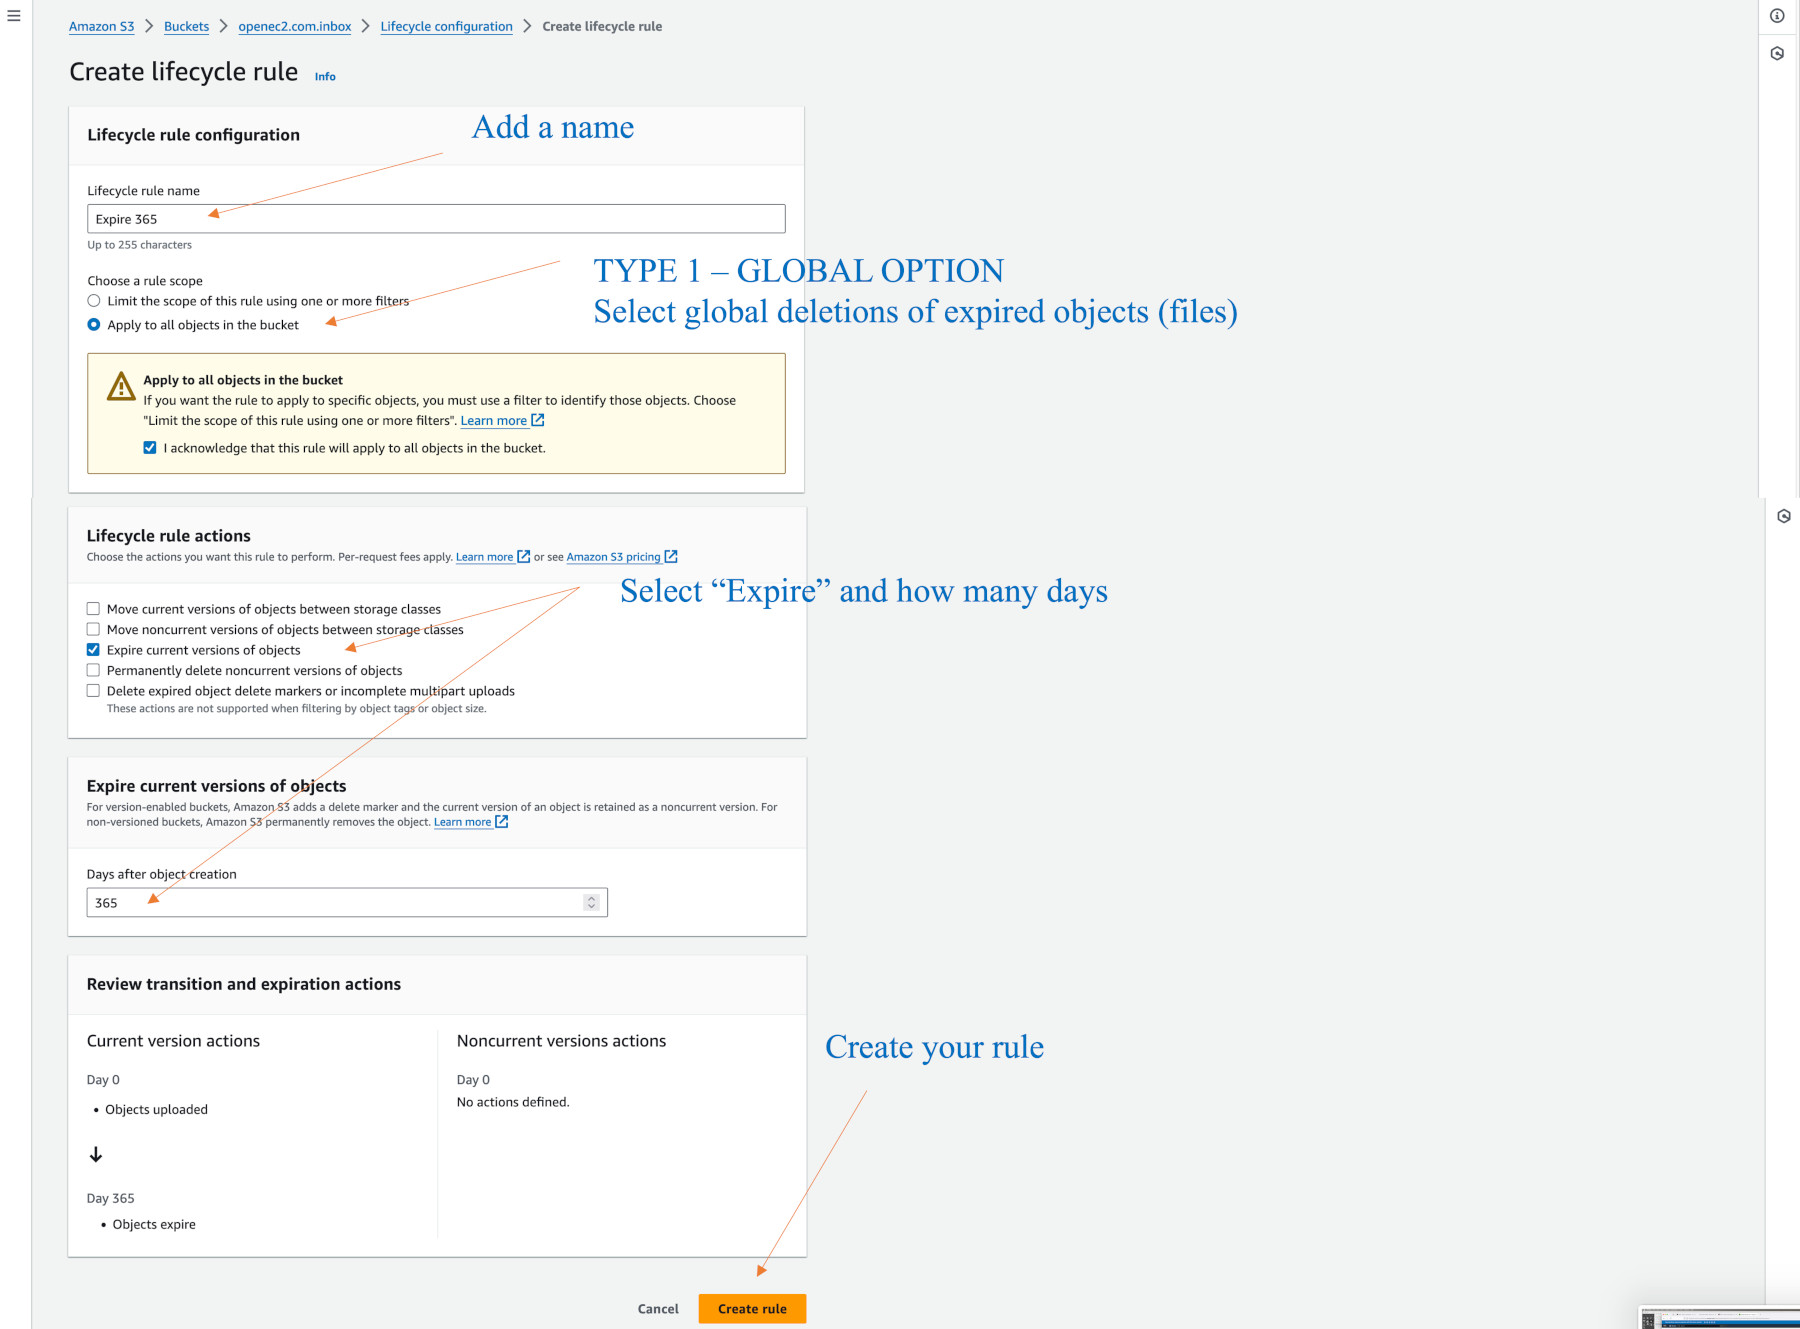
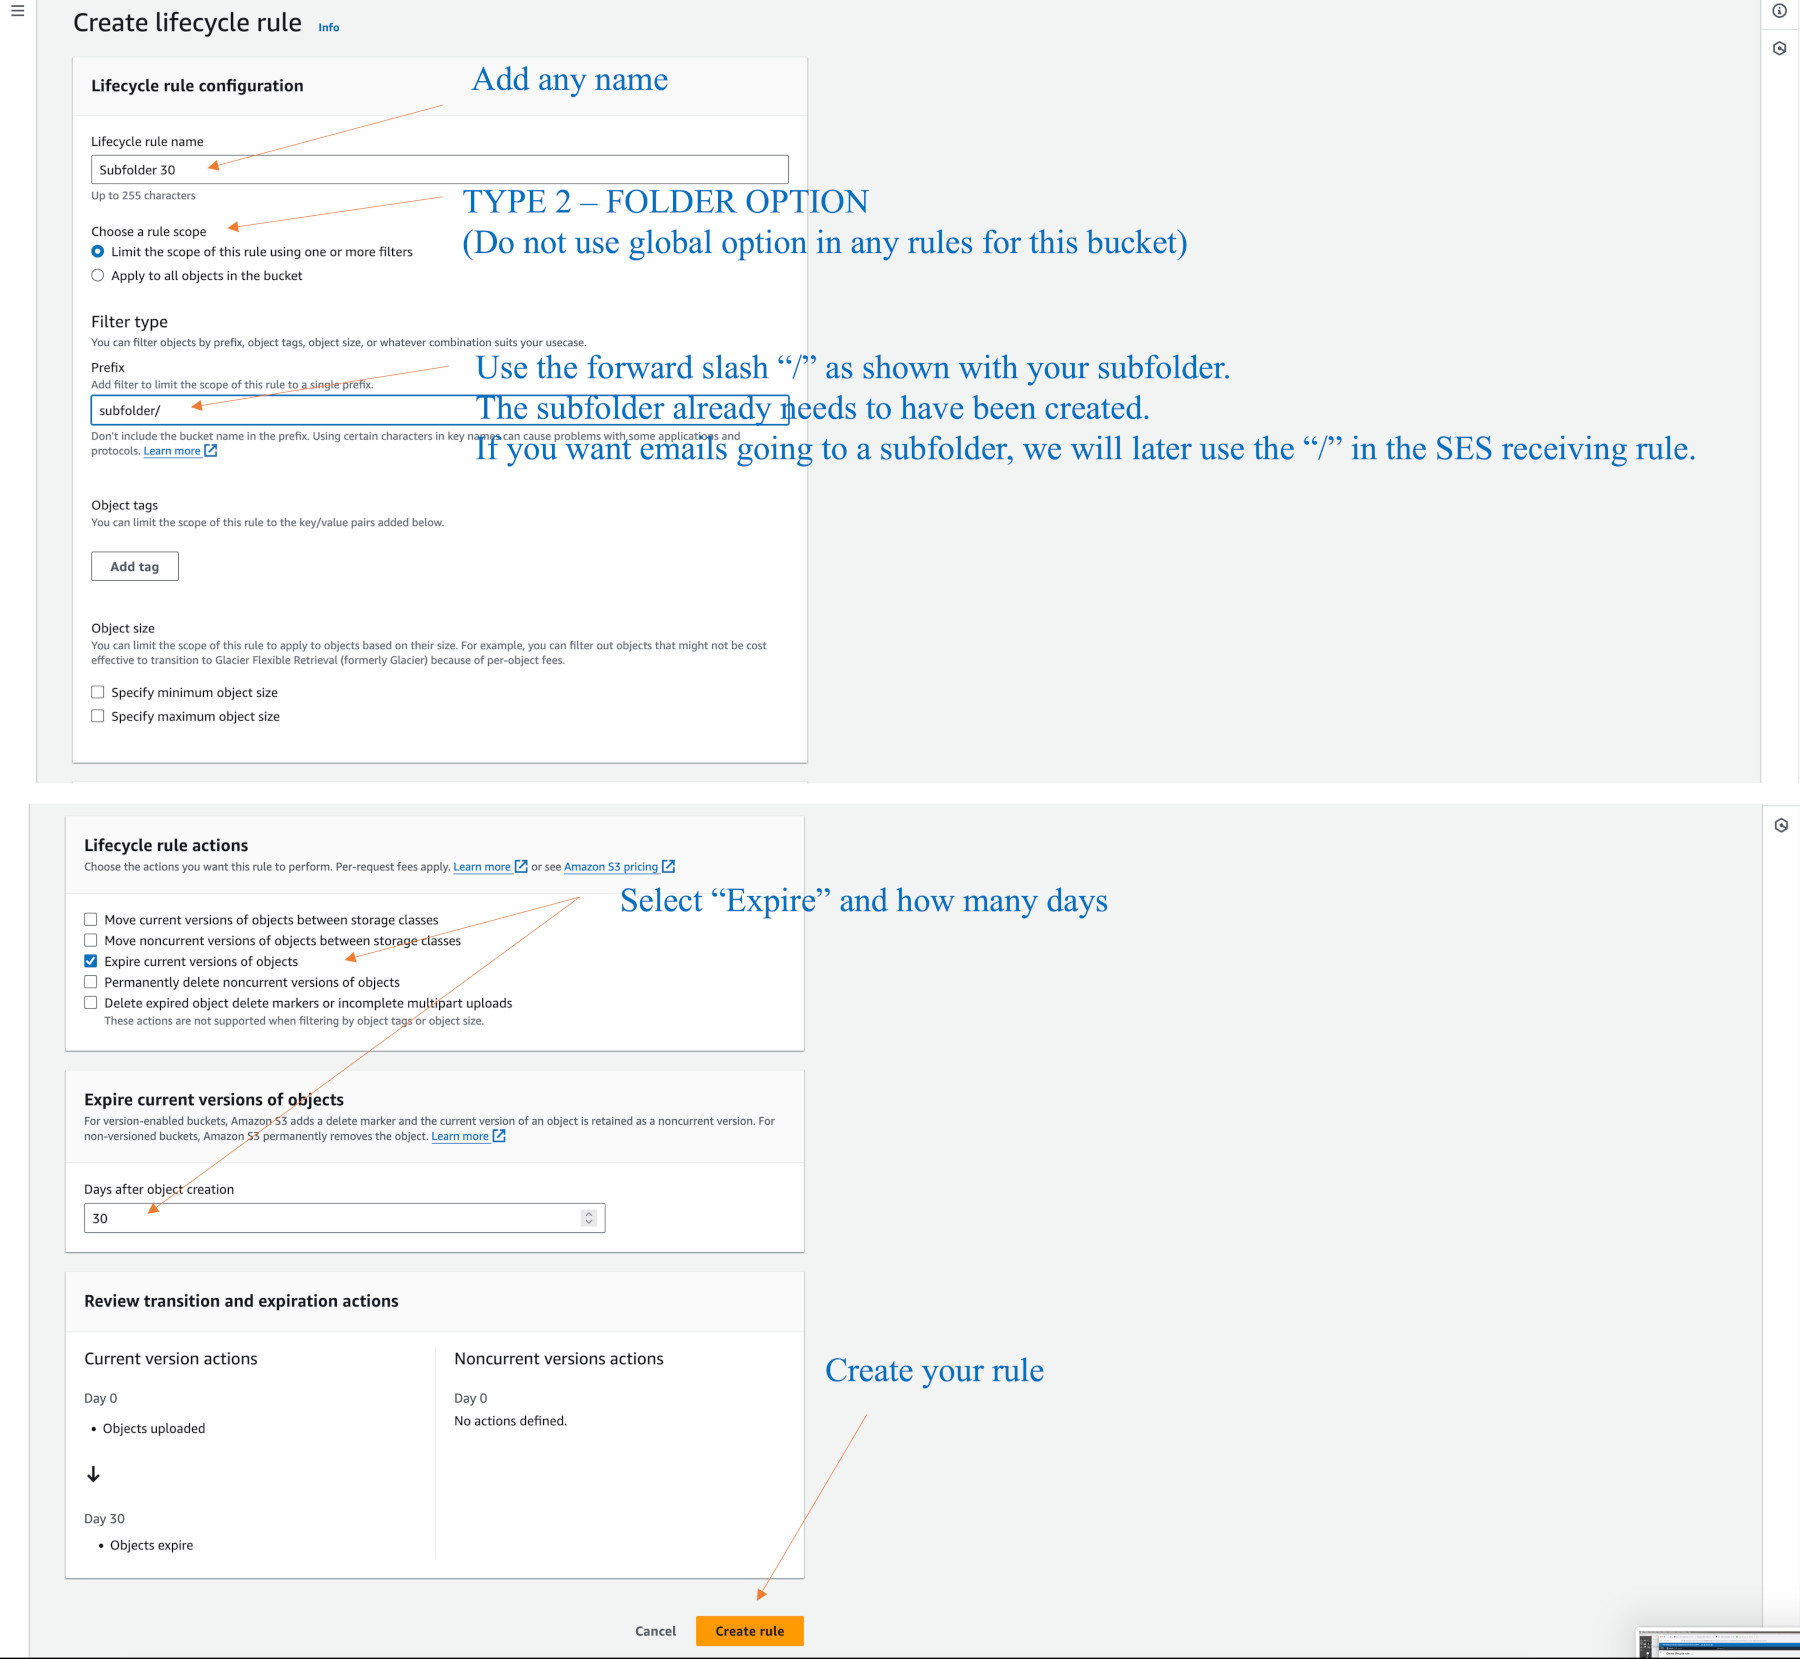
There are two types of lifecyles we use. One expires (deletes) all object for the entire bucket, and one only deletes files under a folder.
Here is the diagram for global expiry:
As a note, I do not use registrar services that give me no access to the DNS CAA records. If you have a website on cPanel, VentraIP does give you this access via cPanel zone editing. I don’t agree or subscribe to people being restricted and made to pay for additional domain management, or, for expensive SSL certificates and services. Amazon Route53 also gives CAA record editing, but it is USD 50 cents per month (+ GST).