openec2 Article Description
Part 4
Configure an SES/S3 Bucket for forwarding email
Keep in mind this lesson is about SES working with your previously created S3 email bucket. You will need to manually download an email at this stage from the bucket, add a .eml file extension to it in order to view the email. After the steps below, we will look at scripting and additional steps with our receiving rule in order to forward the emails to your own email address.We will create an SES email identity, admin@mydomain.com (use your own domain name).
We then create an SES receiving rule to capture that address rather than any address.
Once verified, we add required addresses to comply with Amazon AWS SES services.
Then we request Amazon to take your account out of sandbox mode.
Go to Amazon SES – in our case to Oregon.
We first create a rule to capture our admin@ email address before we add admin@ as an identity.
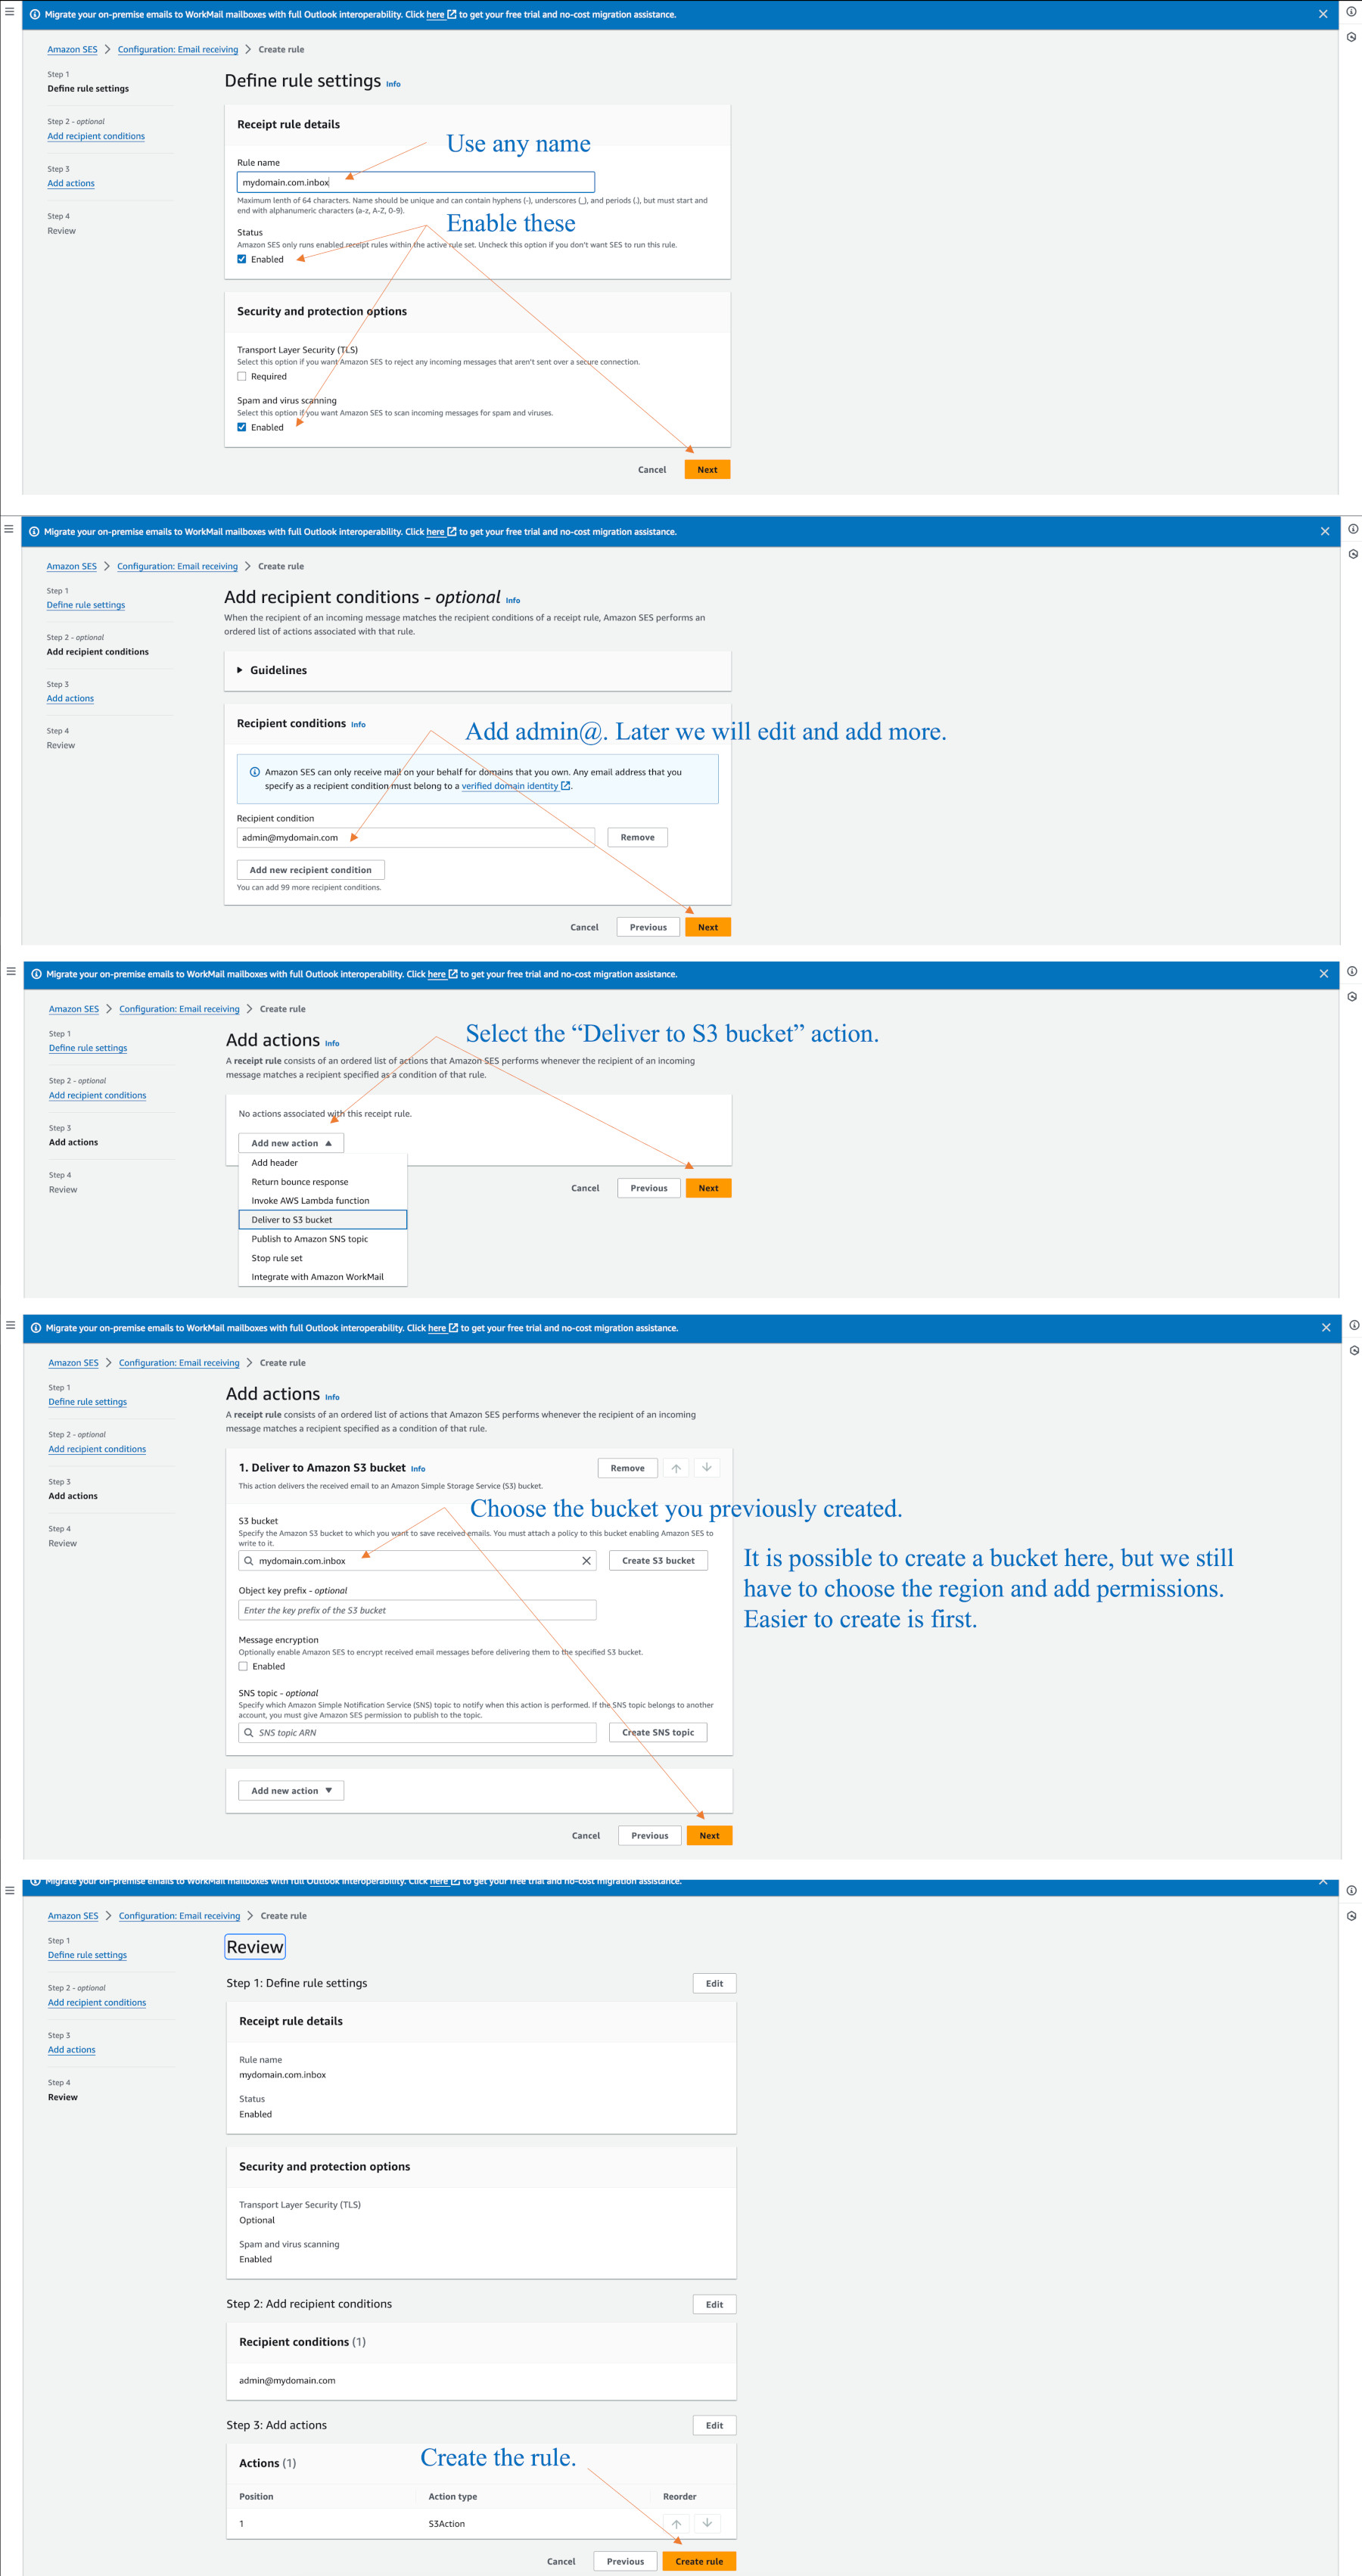
Go to Configuration > Email receiving and click on default-rule-set.
Then click on “Create rule”.
You can click the default-rule-set later at any time to modify or disable rules.
The diagram below shows how we make a rule to capture admin@ if it comes into Amazon SES from the outside world, and send it to our bucket.
When you finish creating the rule, you may be asked to add permissions, so just say yes.
You cannot do this unless the domain name is out of pending state, and verified. If for some reason you made a type with the domain records, just fix them and wait a while until Amazon SES sends you a confirmation email. Expect two emails, one for DKIM keys, and one for MAIL FROM.
If things are terribly wrong, just delete the domain identity and start it again.
Assuming the domain is verified:
Go to Amazon SES – in our case to Oregon.
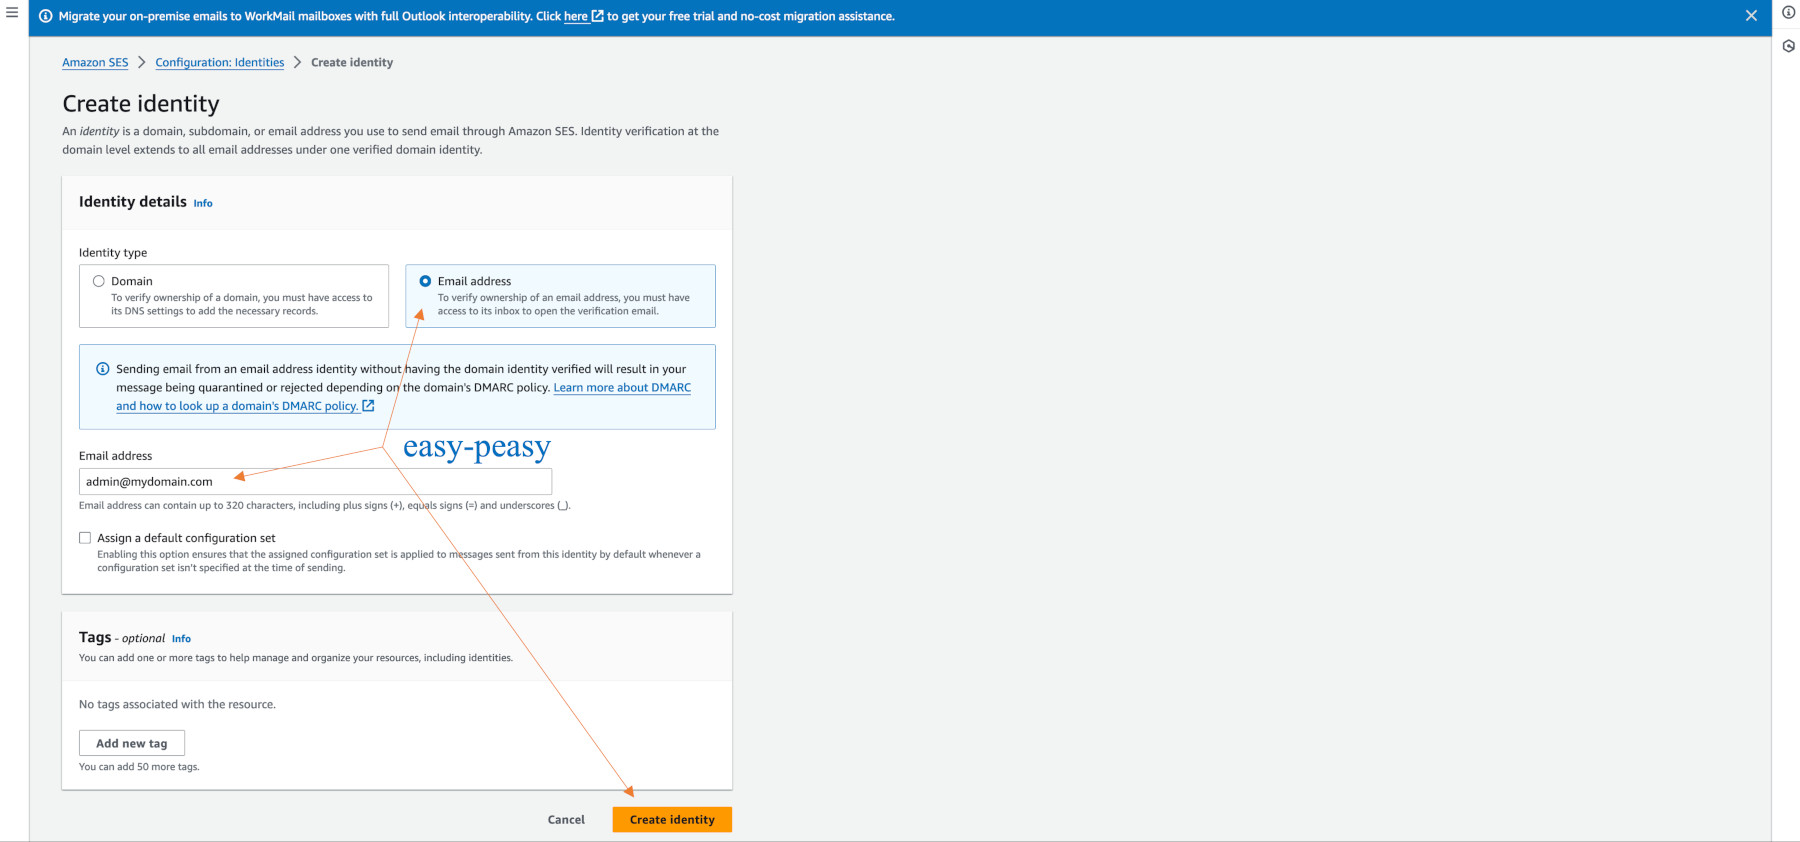
Go to Configuration > Identities > “Create identity” to create an identity.
Click on the email button rather than the domain button.
This is what you will see, however, do NOT add new “Mail From domain” or any other records on the summary screen.
The SES identity page will show the address is pending.
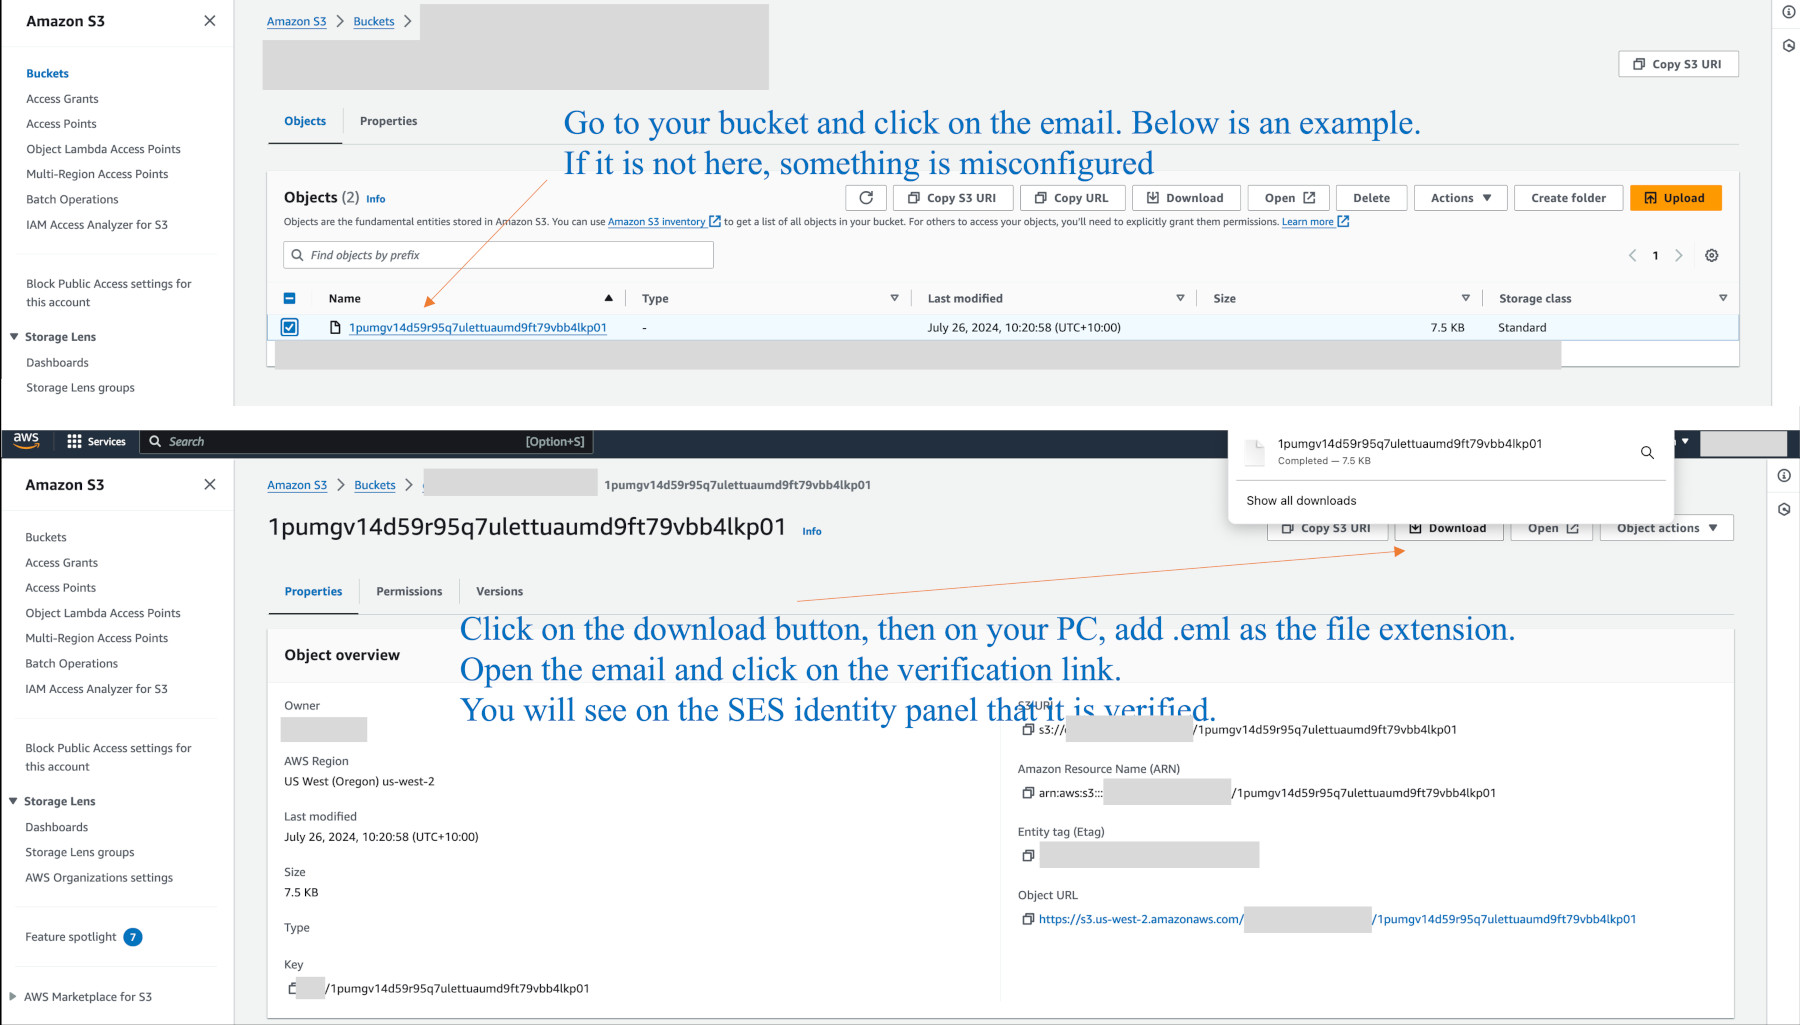
Go to the S3 console and open the bucket, e.g. mydomain.com.inbox. Under Objects you should see the email awaiting you to verify admin@mydomain.com. Click on it to open the next page up. If it is not there, you need to go through the previous steps to see your typo or other mistake.
Click on the email, then click on download up the top. On you PC add the extension .eml to the file. Open it and click on the link. Back on the SES identity page, you can refresh the page and see it is verified. This is particularly important when you are still in sandbox mode, or need to get an email received from an SSL provider.
Next we will add Lambda functions from the email region (Oregan in our example) that use coding to forward an email or notification. These Lambda functions will be added to our default-rule-set rule that we previously created. Before we can do that we create an IAM role to authorise use of the Lambda function(s). We will add a number of addresses to the SES rule so that we capture them. e.g. postmaster@, abuse@, noreply@, contact@, dmarc@, webmaster@. You can add as many as you like. This will all fall into place, but it is more work to learn.


