
Configuring AWS SES & S3 bucket with MS Exchange Inbound mta-sts encryption
I am not experienced in the use of mta-sts, or with its benefit, but I have configured it and provided my own implementation details below.
References
Introduction and First Steps
MTA-STS is a system that is able to use an SSL Certificate to encrypt inbound email to your server if the sender has the ability to do so.
MS Exchange and GMAIL have the ability to do this. Many email services do not.
You can use MX Toolbox to test if a service uses it, by doing an MTA lookup on a server. e.g. mta-sts.EMAILSERVER. For instance, mta-sts.outlook.com
Here is an example:
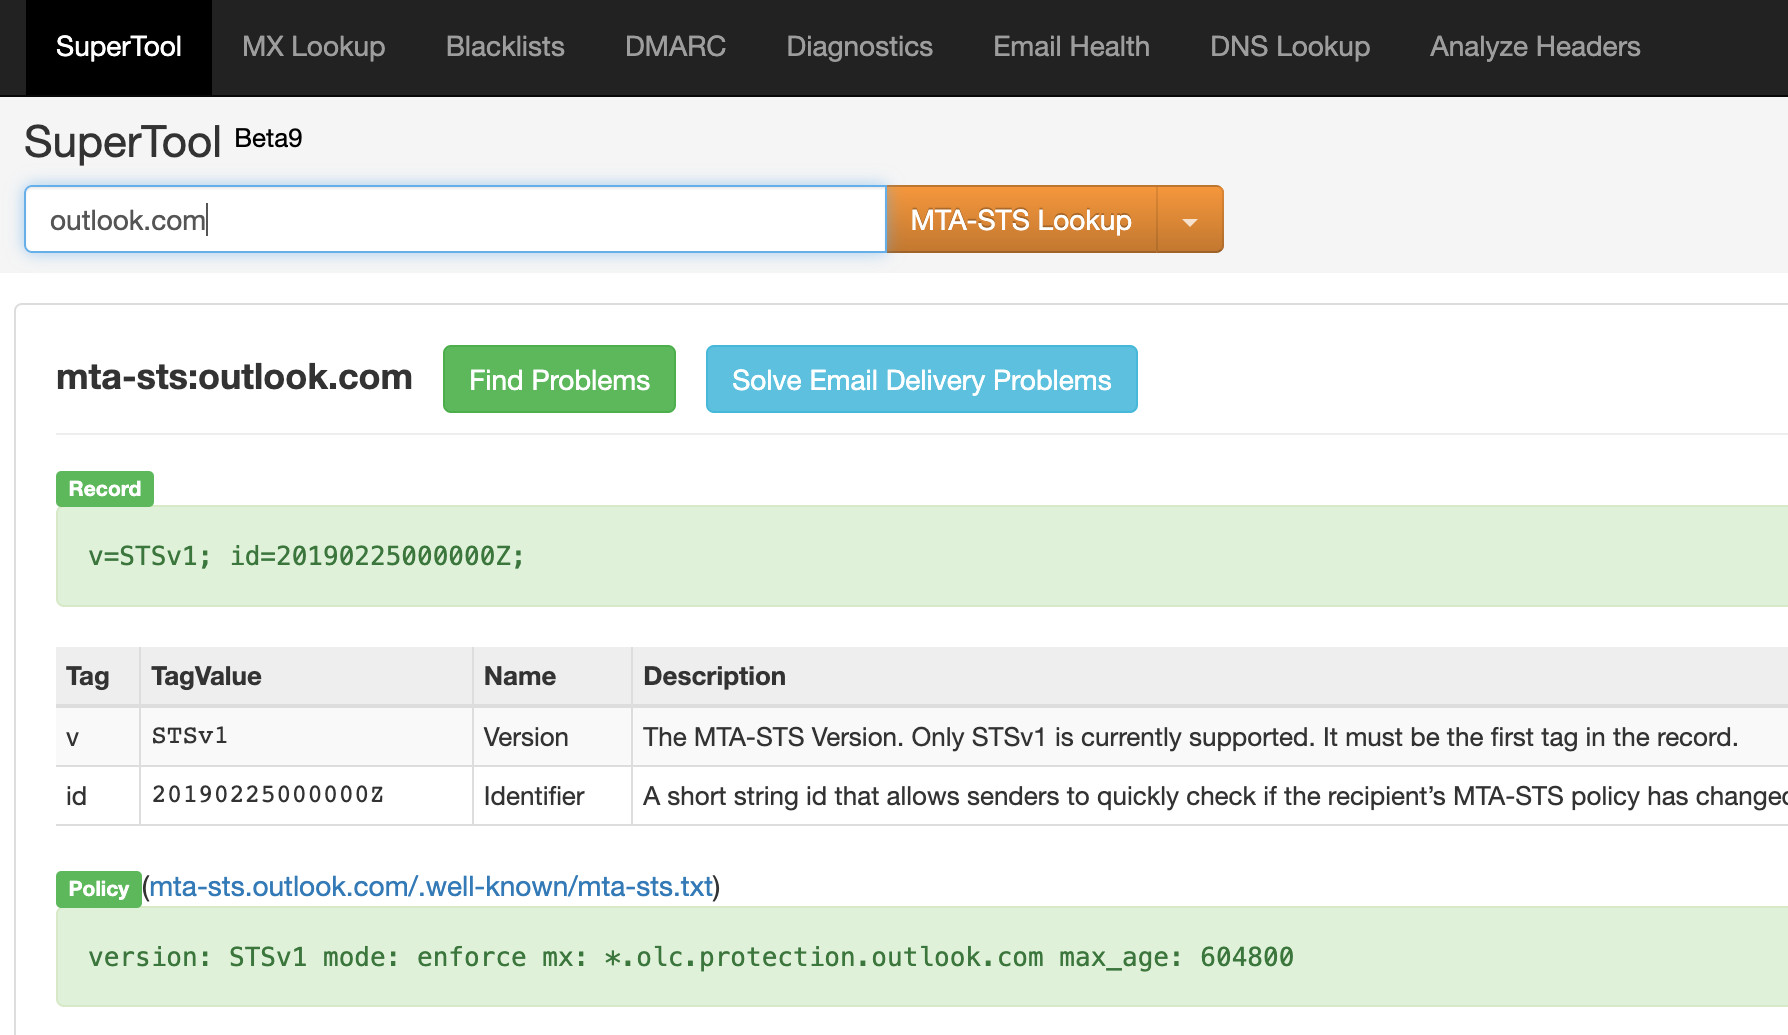
By using “testing” mode, you can see if this is working without hassles, by reviewing reports sent to an address such as tlsrpt@YOURDOMAIN
This system requires a stable YOURDOMAIN website, e.g. foo.com, and a subdomain called mta-sts.YOURDOMAIN, e.g. mta-sts.foo.com
Amazon AWS services can provide the stability and uptime with auto renewal of free SSL certificates.
An overview of the process is: (using foo.com as the example)
Create a static S3 Bucket website for the Top Level Domain, foo.com with whatever files you wish, such as index.html, 404.html, favicon.ico. You can add code to the index.html file to redirect it to some other website such as mywebsite.com. This is simply pre-work, so https://foo.com will not be working just yet.
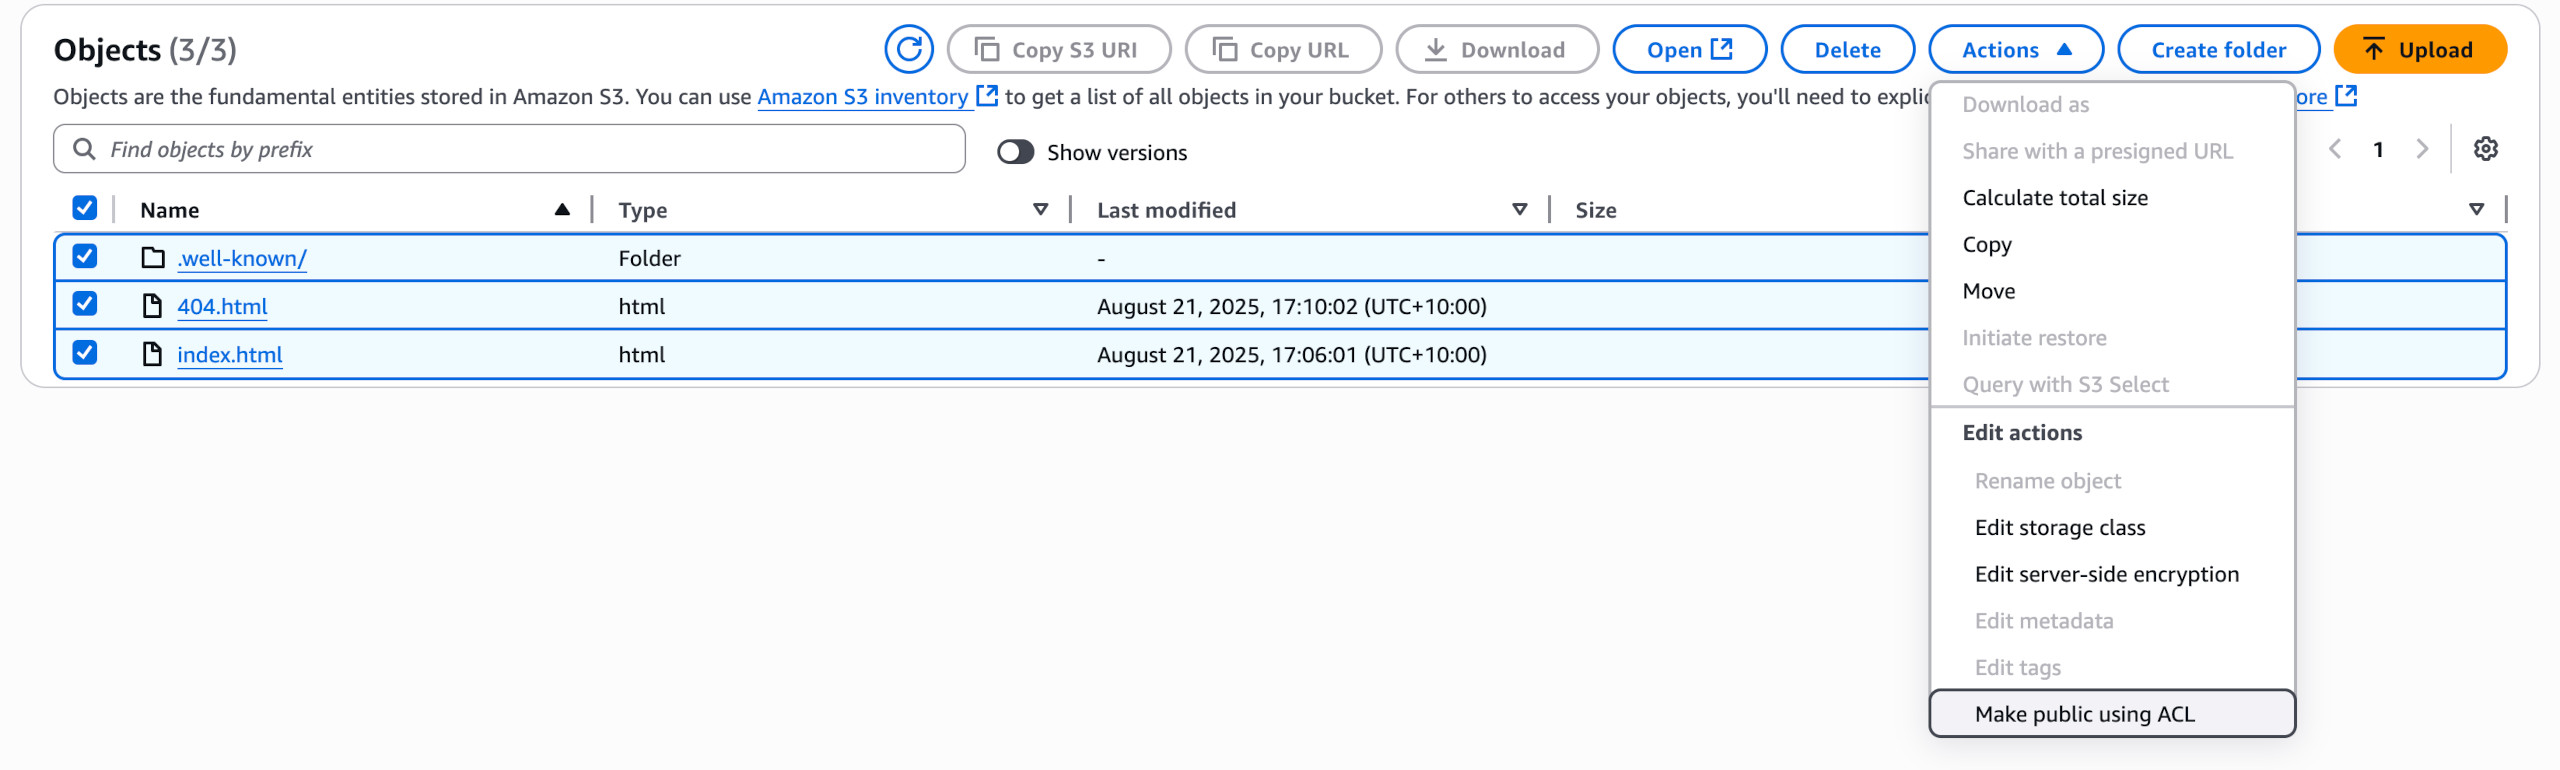
The buckets should be created with public access in your region. There is no real need to use bucket versioning. When you add fodlers/files, use the popdown menu to make them all public access. Later, when we create the Cloudflare CDN distributions, we will later alter them to have no caching. Otherwise if you change file content it will still pick up old content. Invalidating old content won;t remove the otherwise caching problem.
After all the testing and configurations, you could try disabling the S3 bucket website and use your DNS to point foo.com to an IP address with the real website. This would let the bucket sit dormant. You’d have to test.
Create another S3 static website bucket called mta-sts.foo.com
Add a blank index.html file perhaps with a title in the meta data, an error file such as 404.html. Create a subfolder called .well-known
Upload to .well-known a txt file with the following content if using MS Exchange. Save the file as mta-sts.txt
version: STSv1
mode: testing
mx: foo-com.mail.protection.outlook.com
max_age: 604800
If your website was hello.au, it would be hello-au.mail……
You can check with your MS Exchange login what to use and your current MS Exchange DNS records.
The MS Exchange documentation says you can use *.mail…… but I found testing issues from one verification website, so I stuck with the actual DNS record of foo-com.mail…..
It is easy to misspell, so use mta, not mts.
We now add the first required DNS records. Docuemntation says to use a CAA record of amazon.com, but later we will use a CDN (Content Distribution Network) which is virtually no cost, but in previous years I found to avoid any issues to use quite a lot of CAA records.
Here are the basics to add. It does not matter if you already have othe CAA records for the same domain.
CAA foo.com 0 issue amazon.com
CAA mta-sts.foo.com 0 issue amazon.com
I like to add a pair of CAA records for the TLD and subdomain with:
amazonaws.com
amazontrust.com
awstrust.com
issuewild ;
Keep in mind that more records will be added later.
These will be AWS Distribution records, such as:
ALIAS (or CNAME if ALIAS is not available on your DNS Records):
foo.com dxxxxxxxxxxxxx.cloudfront.net
mta-sts.foo.com dyyyyyyyyyyyyyy.cloudfront.net
We will create two distributions so the d….. numbers will differ.
Two CNAME records if you use ALIAS above: I don’t think you really need these, but I added them)
www.foo.com foo.com
www.mta-sta.foo.com mta-sts.foo.com
After the configs are all okay, we enter the triggers that uses mta-sts:
TXT _mta._tls.foo.com v=STSv1; id=175602050106Z;
TXT _smtp._tls.foo.com v=TLSRPTv1; rua=mailto:tlsrpt@foo.com
where tlsrpt@foo.com is added as an Alias to MS Exchange with your you@foo.com primary address aliases.
Then open Outlook and add a folder to your foo.com client called TLSRPT. (Can be anything you want to call it)
I have not tested on other clients, but they should be okay to use.
Note: we must assume you already have spf, dkim, dmarc working correctly.
Once added to MS Exchange, you open Outlook on your desktop and add a Rule that says if the Subject contains the letters “TLS” to move the email to the TLSRPT folder. This is where reports are sent. You may not receive reports at first. DO not go to mta-sts enforce mode unless quite sure you can do so. I have not done enough testing to comment on this.
You could test an email from GMAIL to your primary you@foo.com address and in the raw data you will see the received email content is base64 and there should have been no error in the transmission and receiving of the email.
If GMAIL has odd behaviour such as adding a copy of the email to its own inbox ,you have a filter rule that is tricking things up.
I think it is good to know these will be the steps you need to return to after configuring AWS for using mta-sts.
S3 Bucket details
Configure with Certificate Manager & Cloudfront (CDN)
We assume you have the S3 buckets set up first.
Here are examples of my own mta-sts.foo.com bucket:
The foo.com will have my own favicon.ico (not really required) and only the index.html and 404.html (error) files. Remember to define these files in the Bucket Properties section.
Make sure the bucket Permissions are set. e.g.:
For the mta-sts.foo.com bucket:


{
    "Version": "2012-10-17",
    "Statement": [
        {
            "Sid": "PublicReadGetObject",
            "Effect": "Allow",
            "Principal": "*",
            "Action": "s3:GetObject",
            "Resource": "arn:aws:s3:::mta-sts.foo.com/*"
        }
    ]
}


For the foo.com bucket:

{
    "Version": "2012-10-17",
    "Statement": [
        {
            "Sid": "PublicReadGetObject",
            "Effect": "Allow",
            "Principal": "*",
            "Action": "s3:GetObject",
            "Resource": "arn:aws:s3:::foo.com/*"
        }
    ]
}
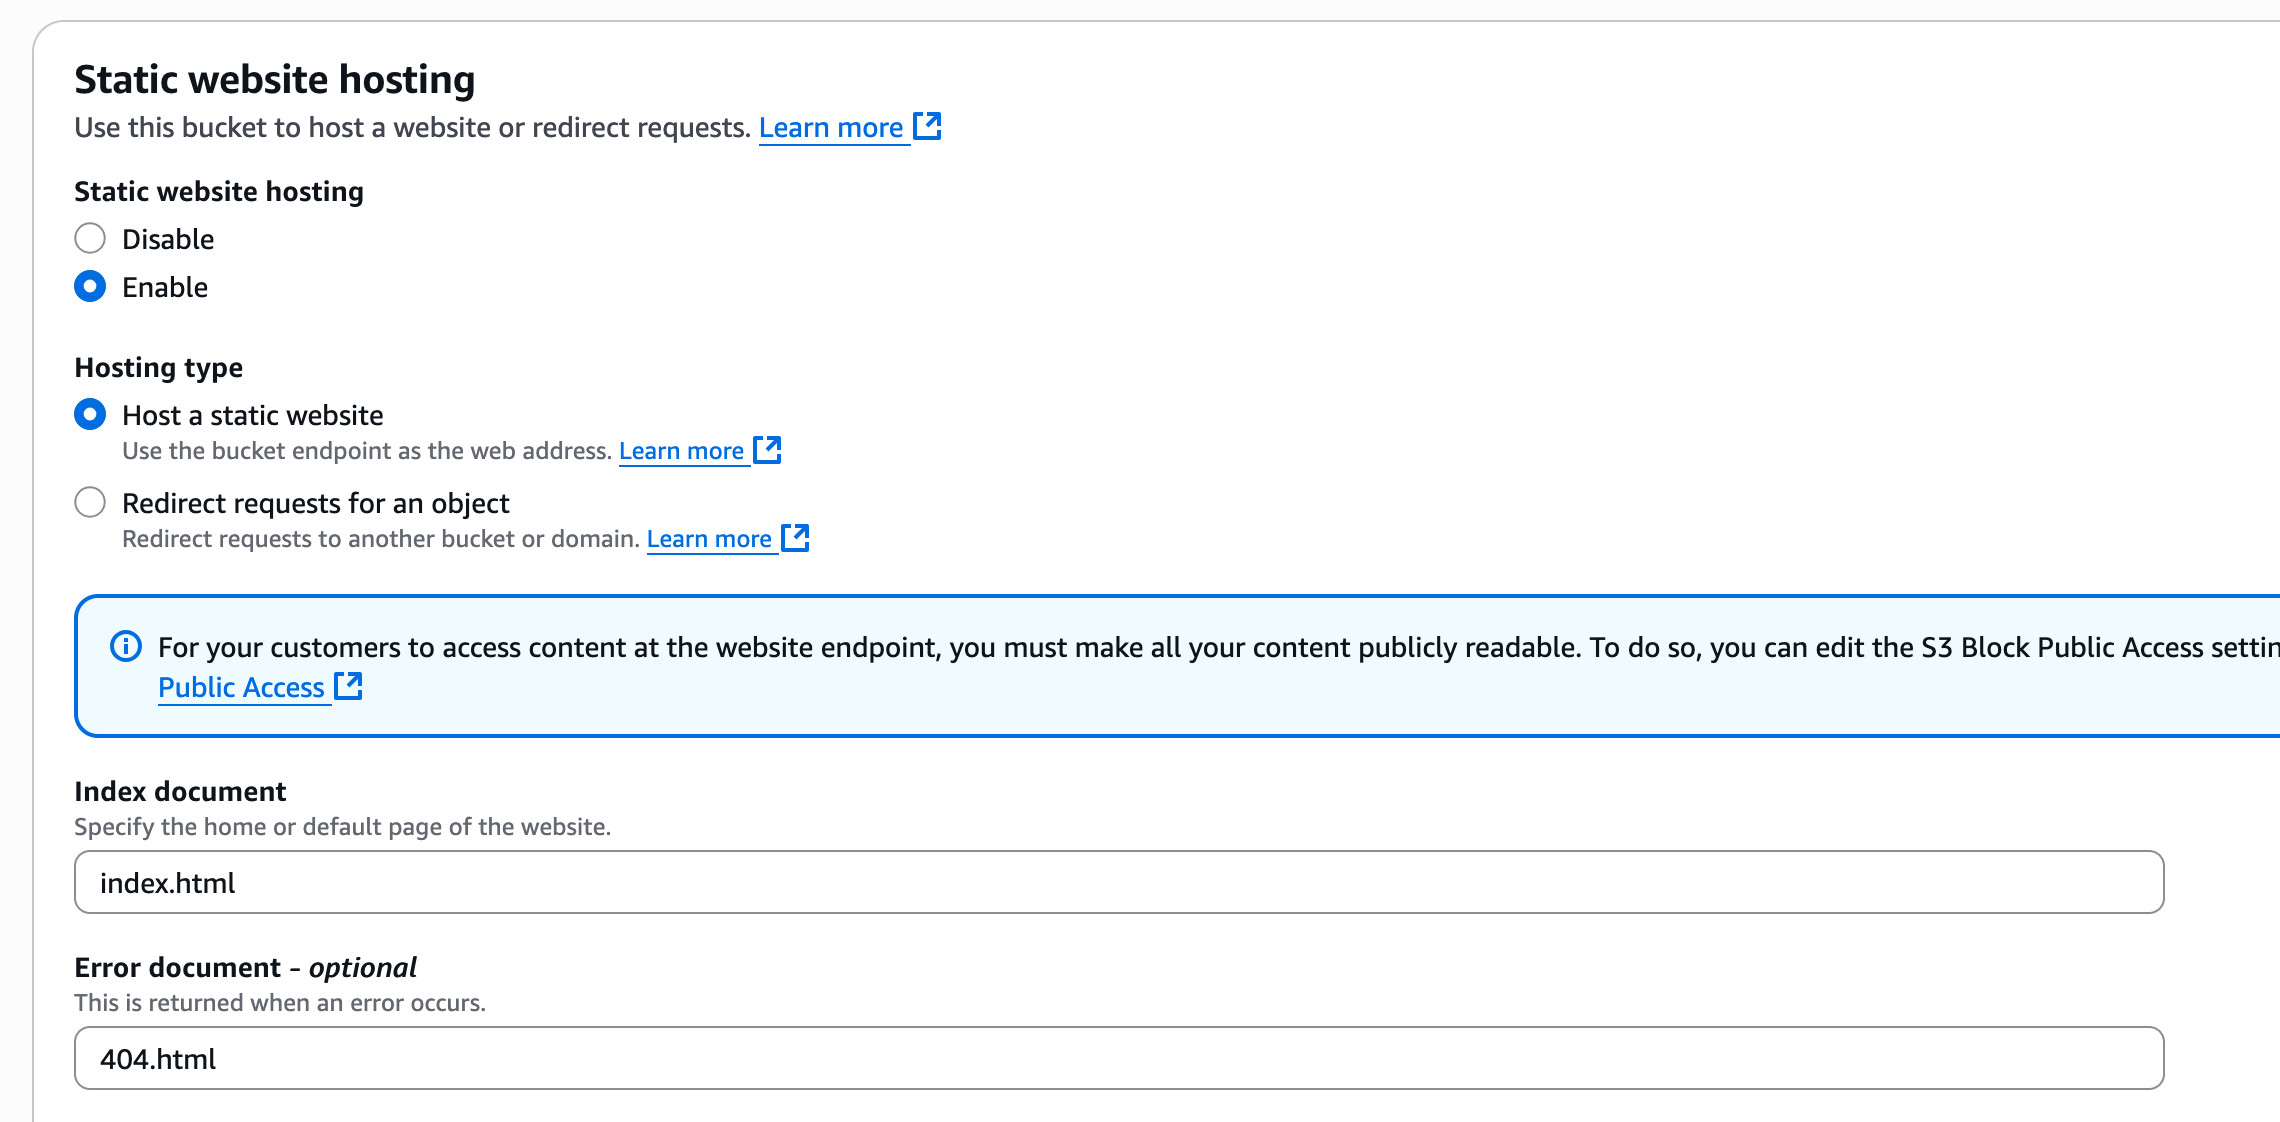
Under the static website section, you will see how I modified the entry to use 404.html as a standard nginx style error file:
The index.html file for foo.com is:
<!DOCTYPE html>
<html lang="en">
<head>
    <meta charset="UTF-8">
    <meta name="viewport" content="width=device-width, initial-scale=1.0">
    <meta http-equiv="refresh" content="0; URL=https://MYWEBSITE.COM" />
    <title>shawlw.au redirect</title>
</head>
<body>
<p>If you are not redirected, click <a href="https://mywebsite.com/">here</a> to go to the MYWEBSITE.COM homepage.</p>

</body>
</html>
Use your own website. YOu may want to do something else. This is what I have done for the moment.
I have not delved into JSON redirect code on the Bucket page as another method.
The blank index.html page on mta-sts.foo.com bucket is:
<!DOCTYPE html>
<html lang="en">
<head>
    <meta charset="UTF-8">
    <meta name="viewport" content="width=device-width, initial-scale=1.0">
    <title>mta-sts.foo.com</title>
</head>
<body>

</body>
</html>
Use your own domain name. You can change the content to anything you wish.
and here is the 404.html page:
<!DOCTYPE html>
<html>
<head>
    <link rel="stylesheet" type="text/css" href="/_errors/main.css"/>
    <title>Error 404 - %{HOSTNAME}</title>
    <style>
        html{
            background-color: #e74c3c;
        }

        body{
            color: #fefefe;
        }
    </style>
</head>

<body>
<div class="error-middle">
    <h1>Error 404 - Not Found</h1>
    <p>The 404 (Not Found) status code indicates that the origin server did not find a current representation for the target resource or is not willing to disclose that one exists. A 404 status code does not indicate whether this lack of representation is temporary or permanent; the 410 (Gone) status code is preferred over 404 if the origin server knows, presumably through some configurable means, that the condition is likely to be permanent.</p>
</div>
</body>
</html>
This is a standard Nginx message page.
Certificate Manager
We go to AWS Certificate Manager in NORTH VIRGINIA and request a public certificate.
Use the default buttons provided.
We type in two domains (Add the second one) for:
foo.com
mta-sts.foo.com
Some folks may wish to use *.mta-sts.foo.com, but I will keep it straight forward.
As soon as the CNAME records are shown, add them to your DNS records.
Amazon sometimes shows a full stop after a record, but most providers remove that dot character, or sometimes the Amazon double quotes.
It can take quite a while for verification so go and do the clothes ironing or an outdoors walk.
Just check you have no spelling mistakes on the records.
Once the CNAME records are validated, you can create two distribution in Cloudfront.
Cloudfront (CDN) Distributions
From AWS Cloudfront, create two distributions.
Use the default values, and come back once created to edit them.
When you create or edit, they take some time to be deployed and enabled.
Distribution for foo.com:
The distribution name is the domain name, e.g. foo.com. Leave the defaults as-is and click on Next. The Origin Type is the default of Amazon S3.
For the S3 Origin, click on the Browse button and select your static website bucket, e.g. foo.com
When you select it, it will prompt you to use a recommended end point as it knows it is a static website you previously created, so click on that.
Stay with the defaults and click Next.
On the next screen, disable security. (Security costs money)
Click Next and Create Distribution.
Now go to the distribution and you will see something like:
foo.com dxxxxxxxxxxxxxxxx.cloudfront.net
Add this as an ALIAS to your DNS, or if not, as a CNAME. If there is a CNAME already using foo.com, you would have to delete that. On Route53, if can be an A Record, where you then click on the Alias option.
On the distribution general tab, you will see Alternate Domain Names. Add foo.com. (If the distribution is not yet enabled, you can wait and then add it.)